Studio
Run a Macro from the Marketplace: Your First Run
Run a macro from the MAS Marketplace: install a bot, add your BlueStacks or cloud device to a device group, set its options, and start a clean first run.
- Windows
- Mac
- Emulator
- Cloud device
- Studio
On this page
- Before you start
- Steps
- 1. Open the Marketplace
- 2. Install the bot to run on BlueStacks or a cloud device
- 3. Open Device Groups
- 4. Create a group
- 5. Choose a cloud device group, if you have cloud devices
- 6. Click Add Device
- 7. Enter the device details
- 8. Run the macro from the Marketplace
- 9. Set the macro’s options
- Common issues
- Macro cannot find buttons
- Run stops early
- Device not found
This guide shows how to run a macro from the Macro Automation Studio (MAS) Marketplace: install a bot, put a device in a group, and launch a first run you can watch in the logs. It is written for a first-time user with one emulator open.
Before you start
- The latest MAS build installed and signed in. See Install; the app is a free download for the trial from the download page.
- One emulator running with ADB enabled, or a cloud device allocated on Cloud Devices. See Devices.
- An active trial or subscription, so the Marketplace can load.
Steps
1. Open the Marketplace
Click Marketplace in the sidebar. The listings open sorted by Most downloads. Use the search box or the Category filter to find the bot you want.

2. Install the bot to run on BlueStacks or a cloud device
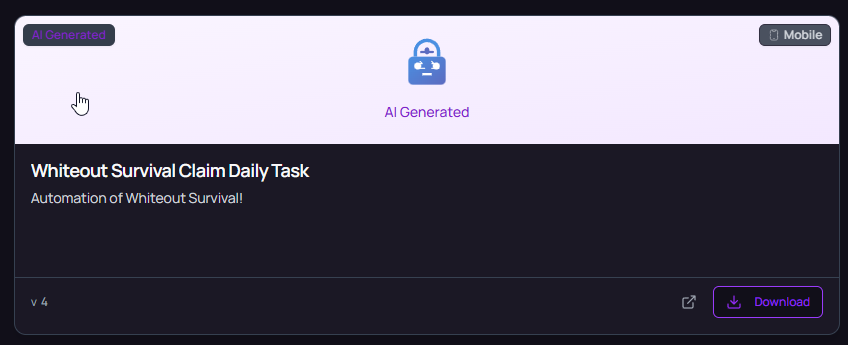
Click Download on the card. MAS adds the bot to Macros with a Market badge. Nothing is stored on disk: the script is fetched from MAS each time a run starts, and you stay on the version you installed until you click Update. Marketplace explains installing, updating and removing bots in detail.
3. Open Device Groups
Click Device Groups in the sidebar. A group holds the devices you want to manage together, so you can start and stop them as one.

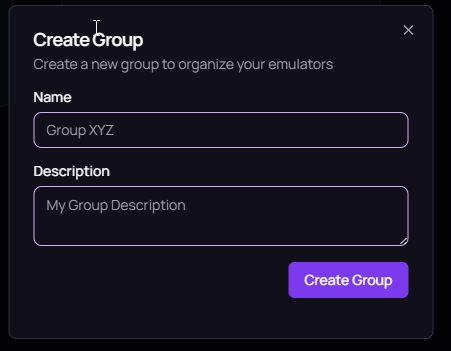
4. Create a group
- Click Create Group.
- Enter a Name of at least 3 characters.
- Choose the Type: Local for emulators on this computer, or Cloud for cloud devices.
- Add a Description if you like, then click Create Group.
The type cannot be changed after the group exists, so pick it for the devices you plan to add.
5. Choose a cloud device group, if you have cloud devices
If the bot should run on a cloud device, create the group with the type Cloud. In a cloud group the header button reads Add cloud device instead of Add Device. Click it, pick one of the devices you allocated on Cloud Devices, and click Add. No port is needed, because the device runs on MAS servers. Skip steps 6 and 7 and continue with step 8. See Cloud devices for allocating one.
6. Click Add Device
In a local group, click Add Device at the top right of the group page.

7. Enter the device details
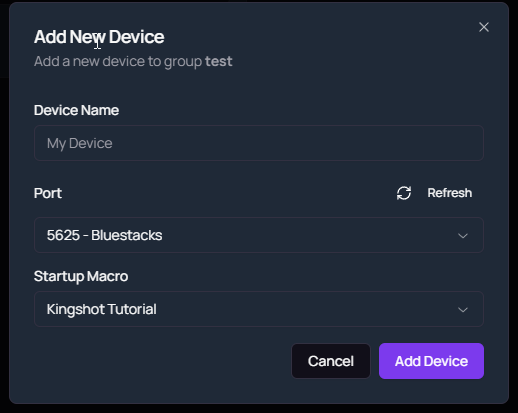
- Type a Device Name.
- Pick the emulator’s Port from the list. Click Refresh if you started the emulator after opening the dialog, or choose Custom Port and type the number.
- Under Startup Macro, select the bot you downloaded.
- Click Add Device.
If the port list is empty, the emulator is not exposing ADB yet. The BlueStacks guide shows where to enable it and how to read the port.
8. Run the macro from the Marketplace
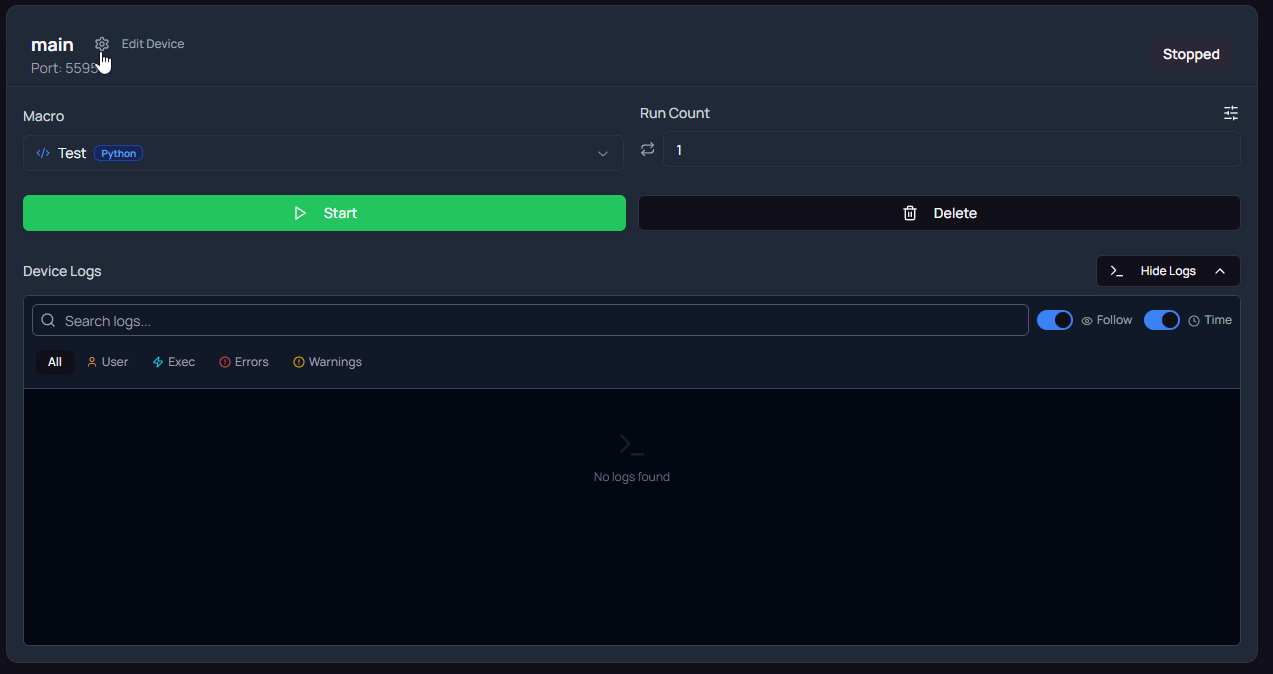
Click Start on the device card, then click Show to open the logs. The status badge moves from Starting to Running, and the first log lines appear. Watch the whole first run: a bot that reaches its loop and repeats it once is set up correctly. Click Stop to end the run.
9. Set the macro’s options
Some bots have their own settings, such as which tasks to run or how long to wait. Click Macro settings under the macro select on the device card. This labeled button replaced the menu icon shown in the screenshot. The form lists every option the publisher exposed. Values are saved for this device, or shared across devices through a settings profile.
Common issues
Macro cannot find buttons
The bot takes screenshots and looks for template images, so the screen has to match what the publisher recorded. Set the emulator resolution and DPI named in the listing description, run the game in the language it expects, and keep the emulator window unobstructed. In the logs, repeated image-not-found lines point at the template that fails.
Run stops early
Open the logs with Show and read the last lines before the stop. Common causes: no macro selected on the card, a required field in Macro settings left empty, or the game showing a popup the bot does not handle. Fix the cause, then click Start again.
Device not found
MAS could not reach the port you entered. The emulator was closed, restarted on a different port, or has ADB turned off. Click Refresh in the device dialog to rescan, or edit the device and enter the new port. If the emulator is running and still does not appear, follow ADB troubleshooting.
Next steps
Related pages
Thanks. If something is wrong, tell us in Discord.
Questions? Ask in Discord